Do you want to sell products online, but lack the space or budget to deal with inventory, packaging, and shipping? Offering physical items for sale online comes with a host of challenges and expenses, not to mention the time and expertise required to design those items in the first place.
Especially if you’re new to ecommerce, it can be much simpler to offer digital items for purchase. Since digital products usually take the form of downloadable files, this approach is less time-consuming and expensive than selling physical goods. Better yet, a simple website is all you’ll need to facilitate orders and process payments.
In this post, we’ll take a look at some of the types of digital products you can offer. Then we’ll show you how to sell digital products and downloads in WordPress. Let’s get started!
Why You Might Want To Sell Digital Products
If you want to make money online, but you don’t want the burden of inventory and shipping, digital products make an excellent alternative to physical goods. Your overhead costs will be much lower, since you won’t need to rent storage space or package and ship orders.
In fact, once you create and list your items, it requires no manual input to process orders on your website. As such, you’re able to earn a largely passive income, which frees up time to focus on other areas of your business.
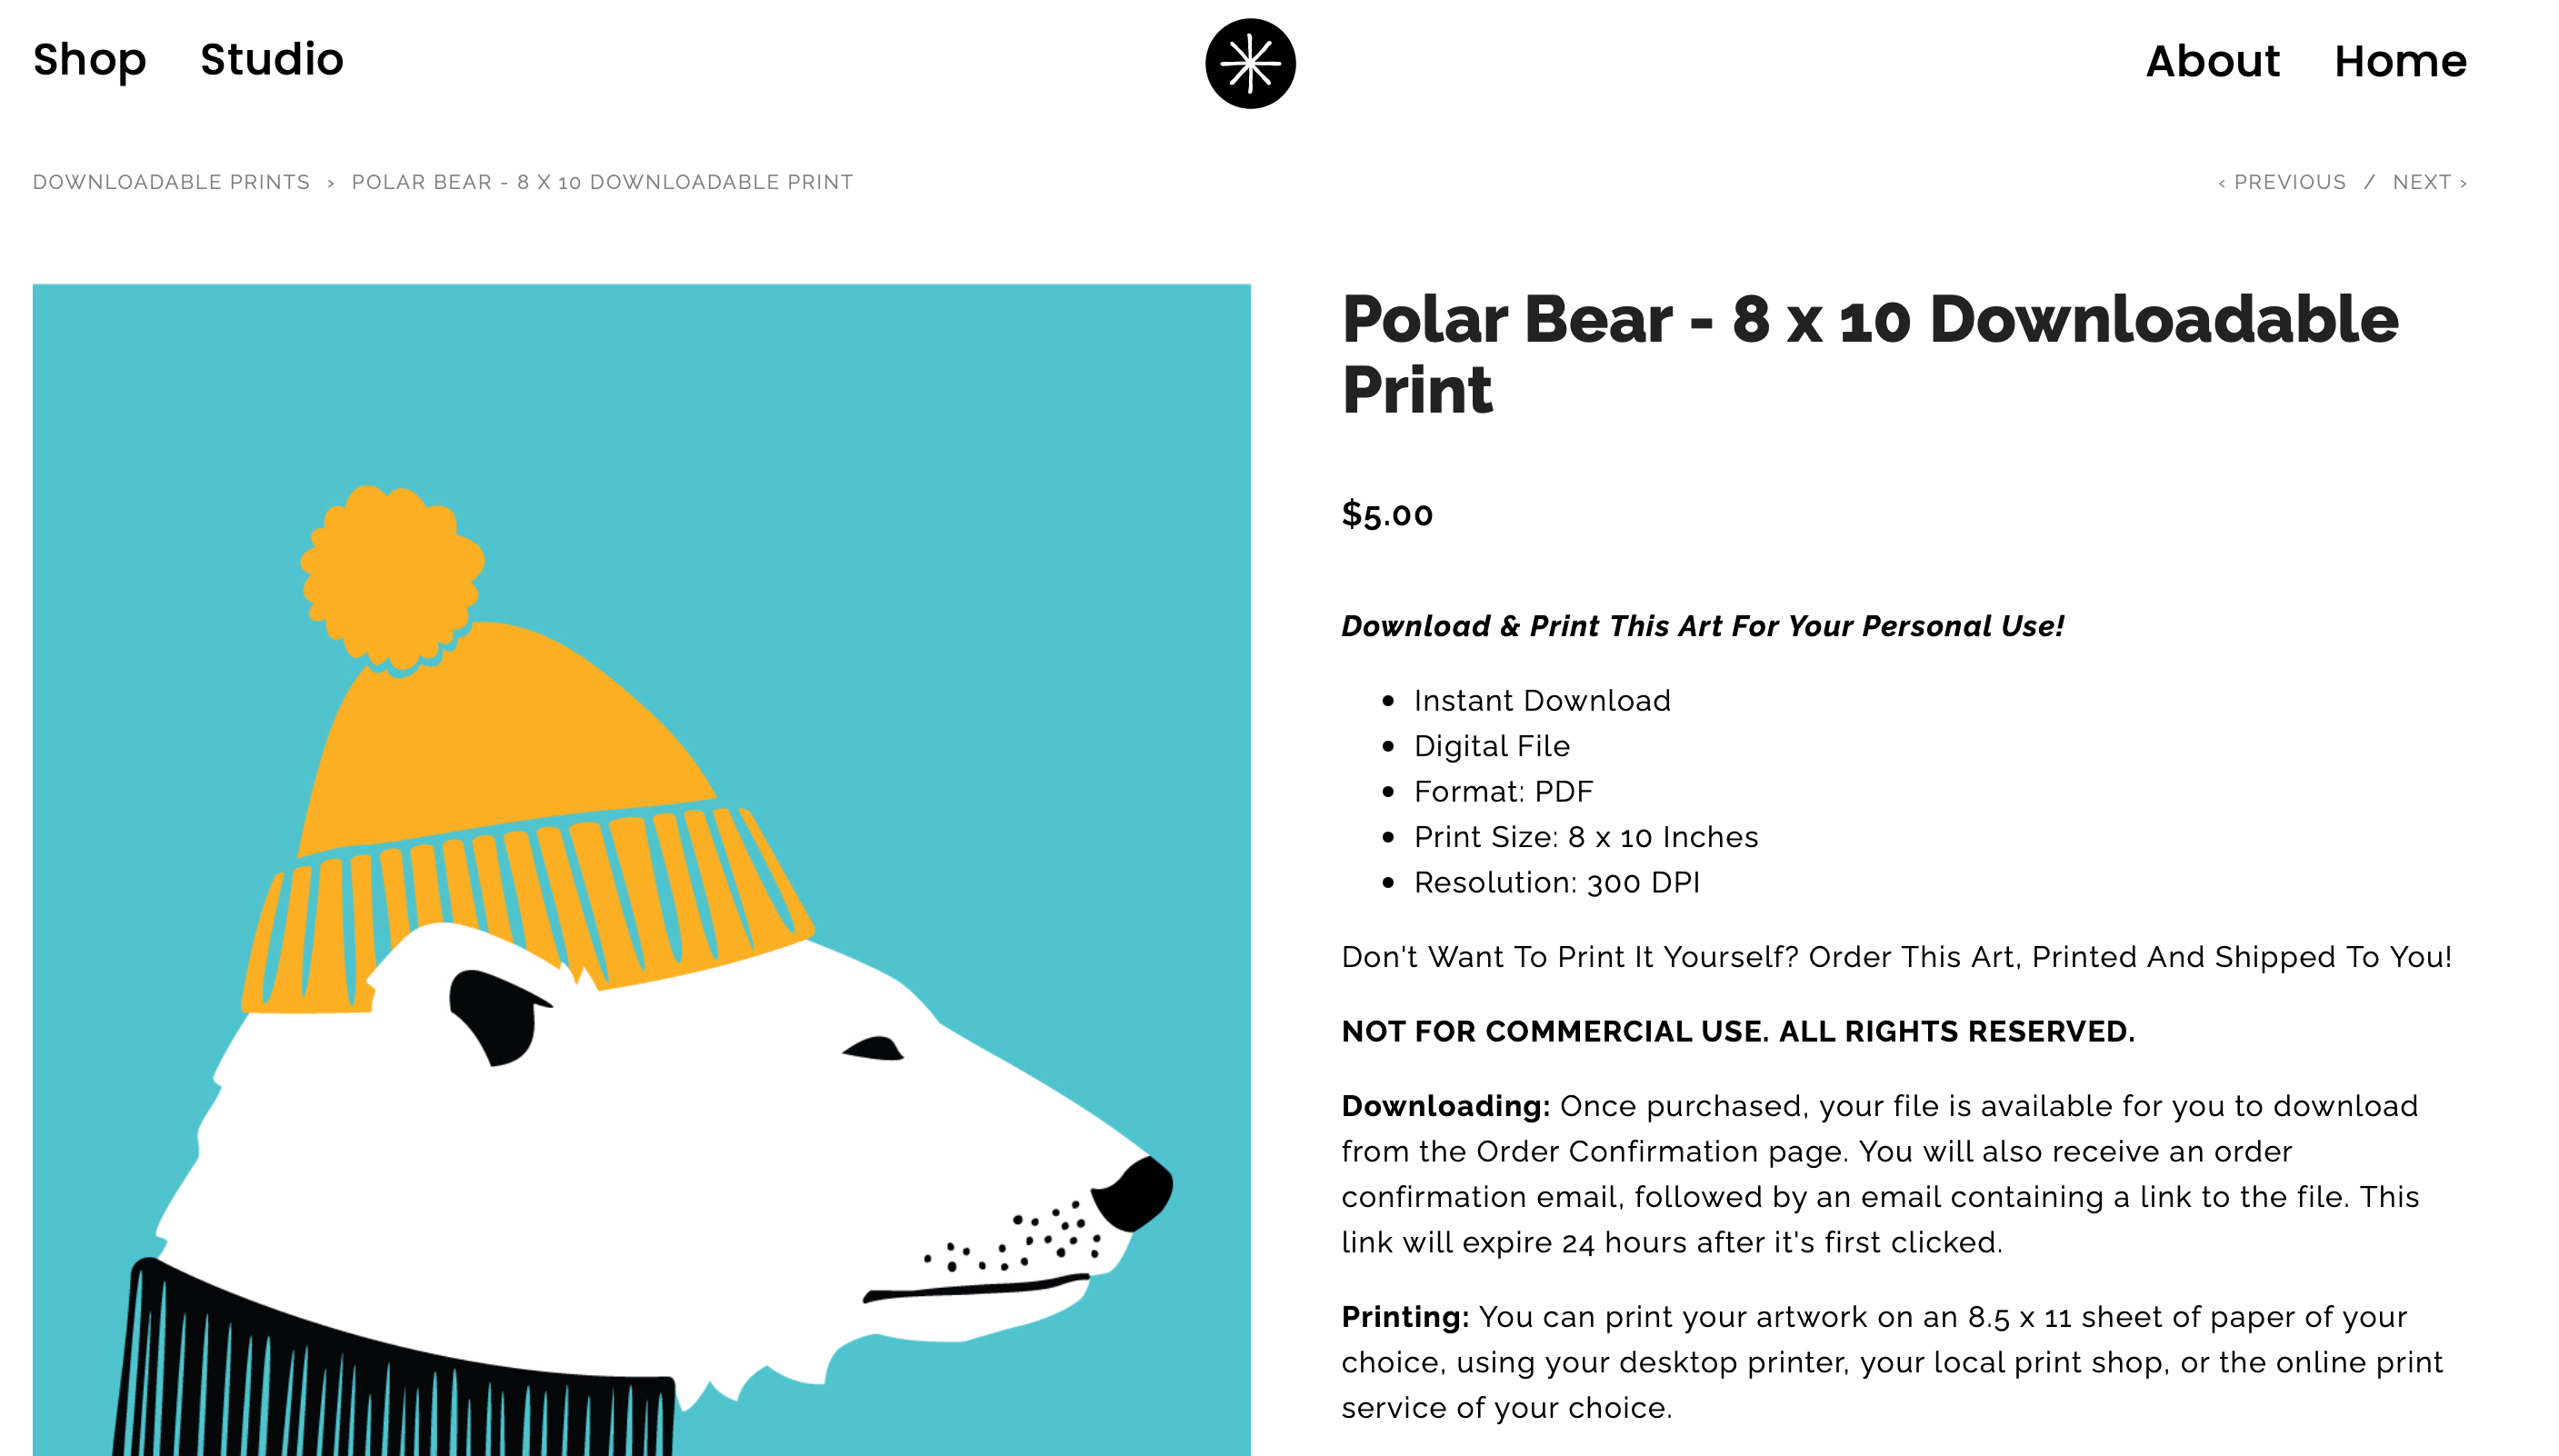
Additionally, since you don’t need to ship goods, you’ll overcome geographical obstacles to serving customers all around the world. Better yet, there’s a huge variety of products you can focus on.
Here are some of the best digital products to sell online:
- Online courses
- eBooks
- Digital templates and prints
- Music and audio files
- Stock photos and videos
- Premium content libraries
- Licensed digital content
- Software and plugins
Naturally, it’s best to choose products that you’re passionate about and that offer value to your target audience. Plus, it’s a good idea to be realistic and think about where your skills and experience lie.
For example, if you’re tech-savvy and possess a specific type of expertise, online courses make a great option. Alternately, if you have a flair for creativity, digital art and prints might suit you well.
How To Sell Digital Products and Downloads in WordPress (5 Steps)
Once you’ve decided what type of products you’ll be selling, it’s time to set up a website as your storefront. With that in mind, here’s how to sell digital products and downloads via a WordPress site.
1. Set Up a WordPress Website
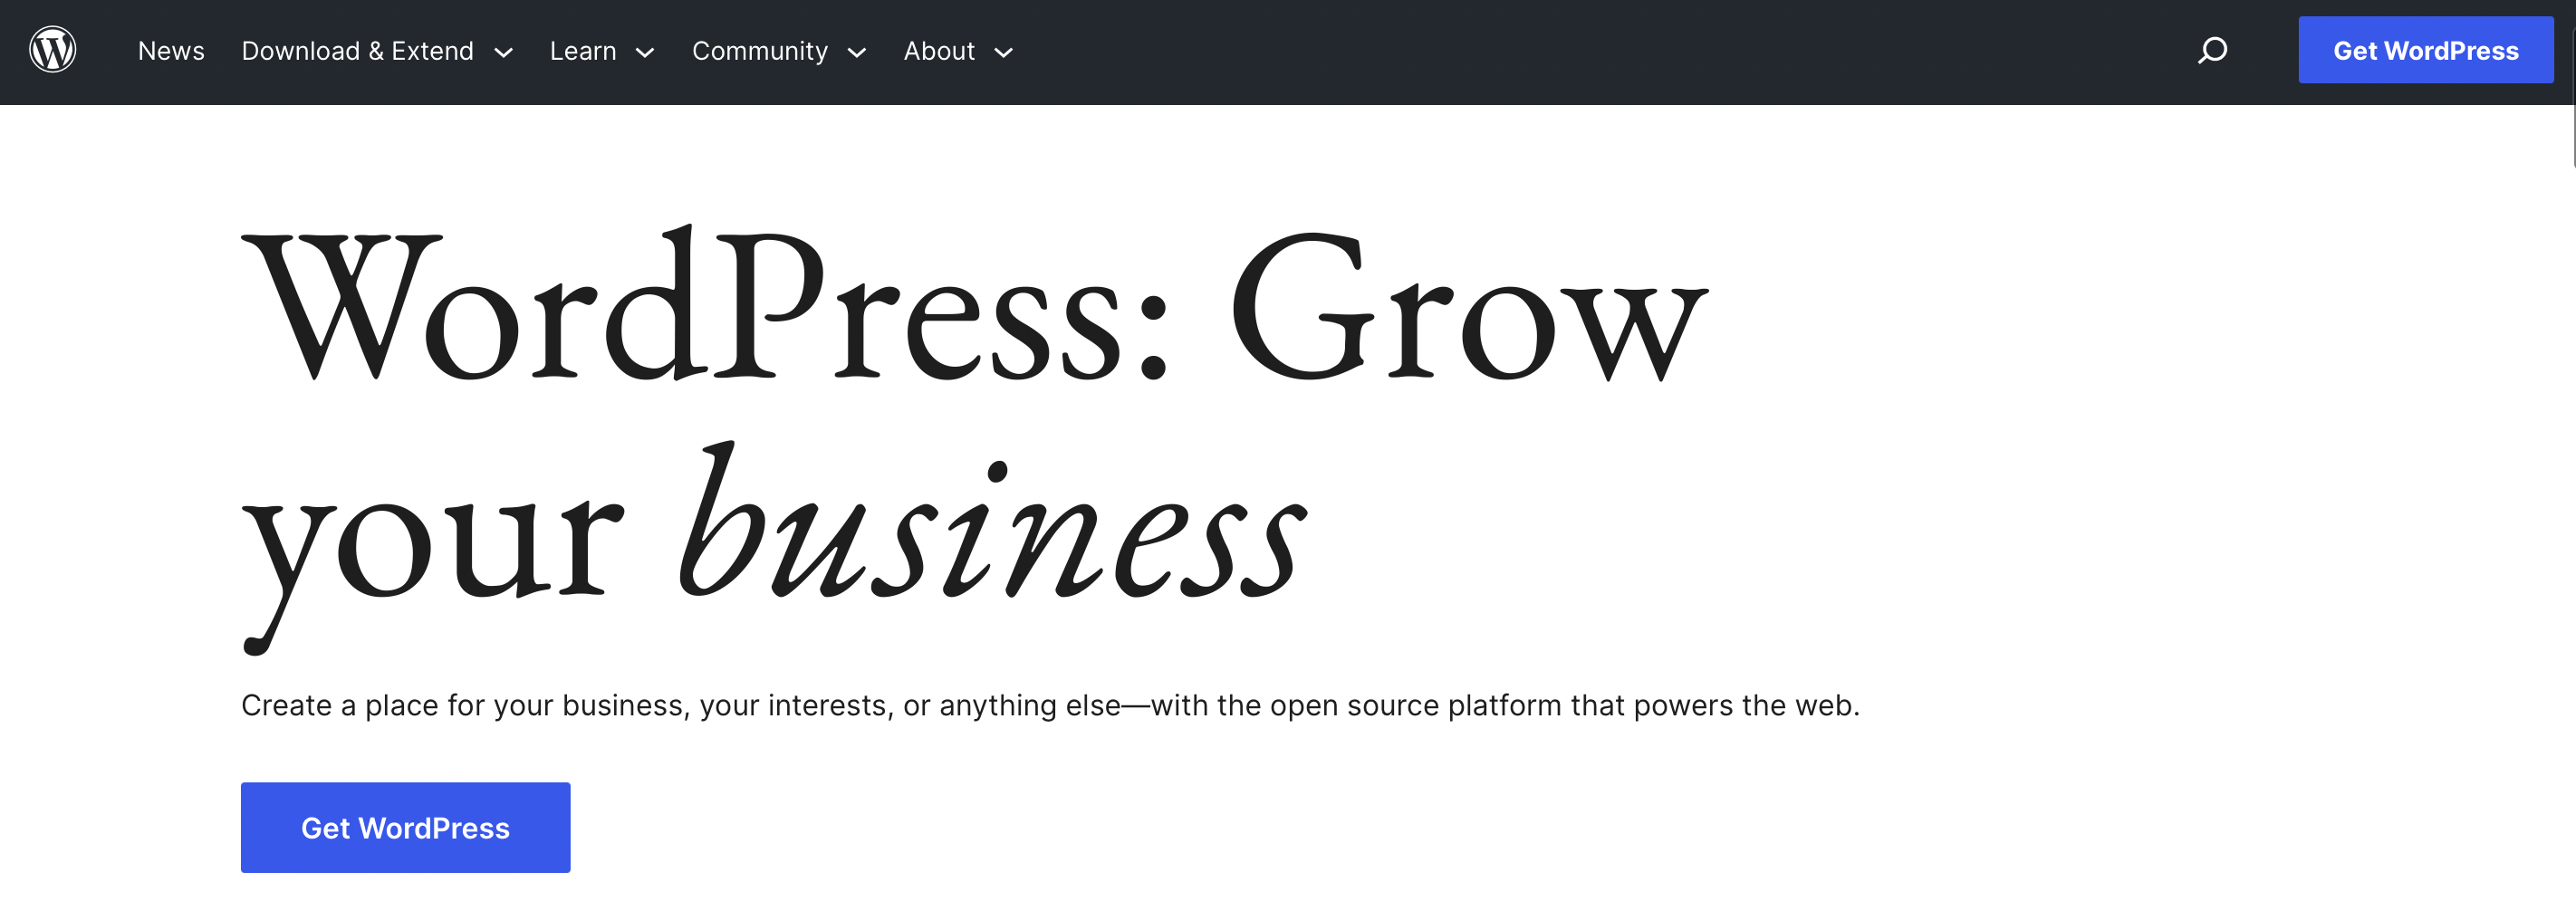
The easiest way to sell digital products online is to create a simple website where you can list items and accept payments. There are lots of ecommerce platforms, but WordPress is a top option, since it’s free, open-source, and easy to customize:
While it’s possible to install WordPress yourself, it’s simpler and more efficient to let your hosting provider do so for you. You’ll need a hosting plan, after all, in order to make your site available to visitors.
Again, there are plenty of web hosts to choose from. At HostDash, for example, we offer dedicated WordPress plans with auto-installations:

Even the cheapest plan supports unlimited traffic and storage. Plus, you’ll get free malware protection, a domain name, and an SSL certificate to keep transactions on your site secure. If you already have a website, HostDash offers free migrations (and a 60-day money-back guarantee).
If you choose a hosting plan that doesn’t include a domain and SSL certificate, you’ll have to purchase and set those up separately. Then, when your website is ready to go, you can choose a WordPress theme to determine its appearance and layout.
2. Install the Easy Digital Downloads Plugin
Now that you’ve set up your WordPress site, you’ll need a plugin that allows you to create and sell digital files. For that you can install Easy Digital Downloads (EDD) which is one of the best WordPress plugins available:

It’s also a great option for membership websites, since you’re able to protect product files with content rules. Plus, you can use it to create discount codes and offer flexible checkout options.
If you want to access all of the payment methods and features, you can purchase the premium version of the EDD plugin. However, the free version will be sufficient for most users.
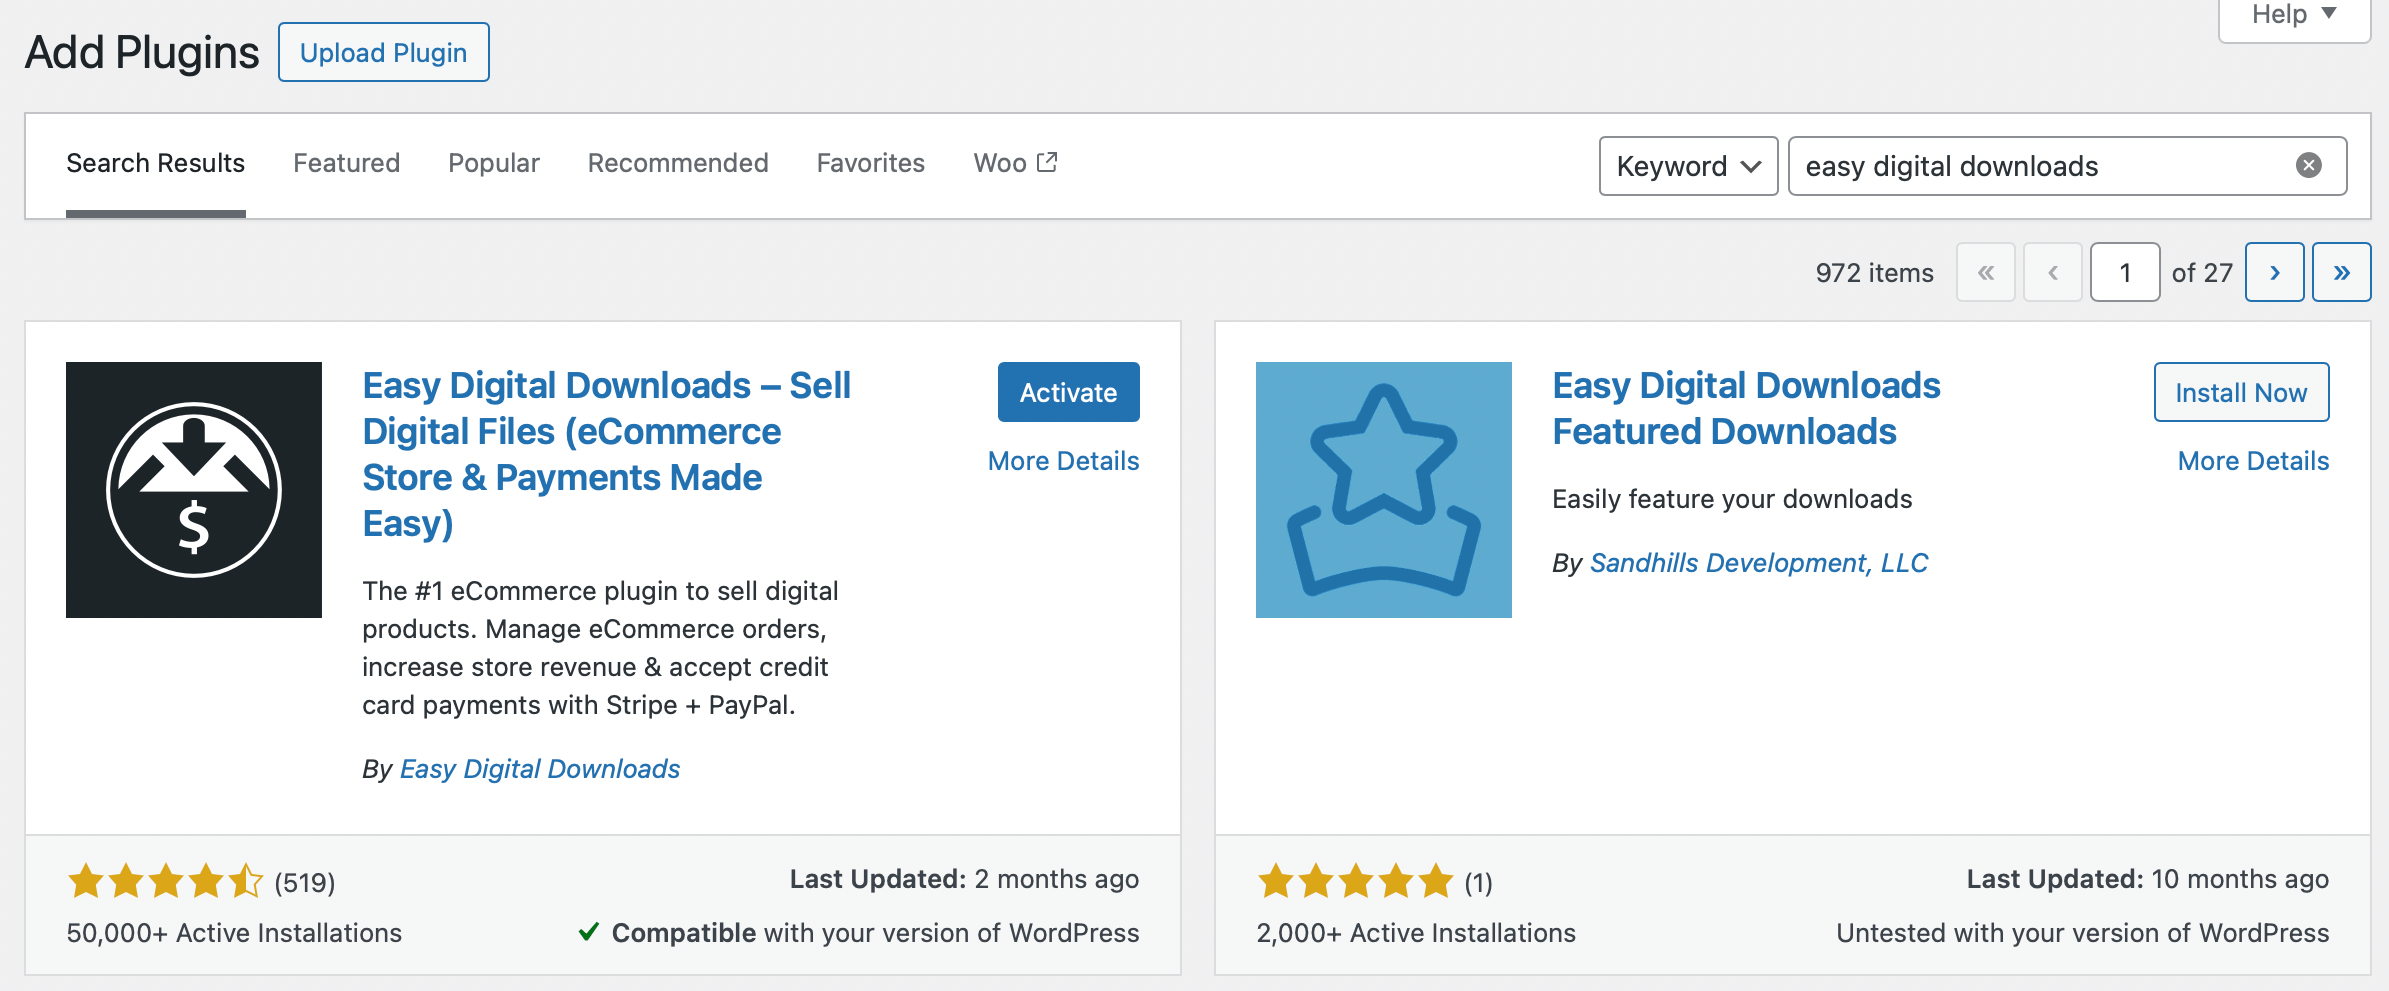
To install the free EDD plugin, head to Plugins > Add New Plugin within your WordPress dashboard. Use the search box to find the plugin, then click on Install Now > Activate:
At this point, you can configure the plugin by going to Downloads > Settings. There, you can enter your store’s location in the Business Country field:
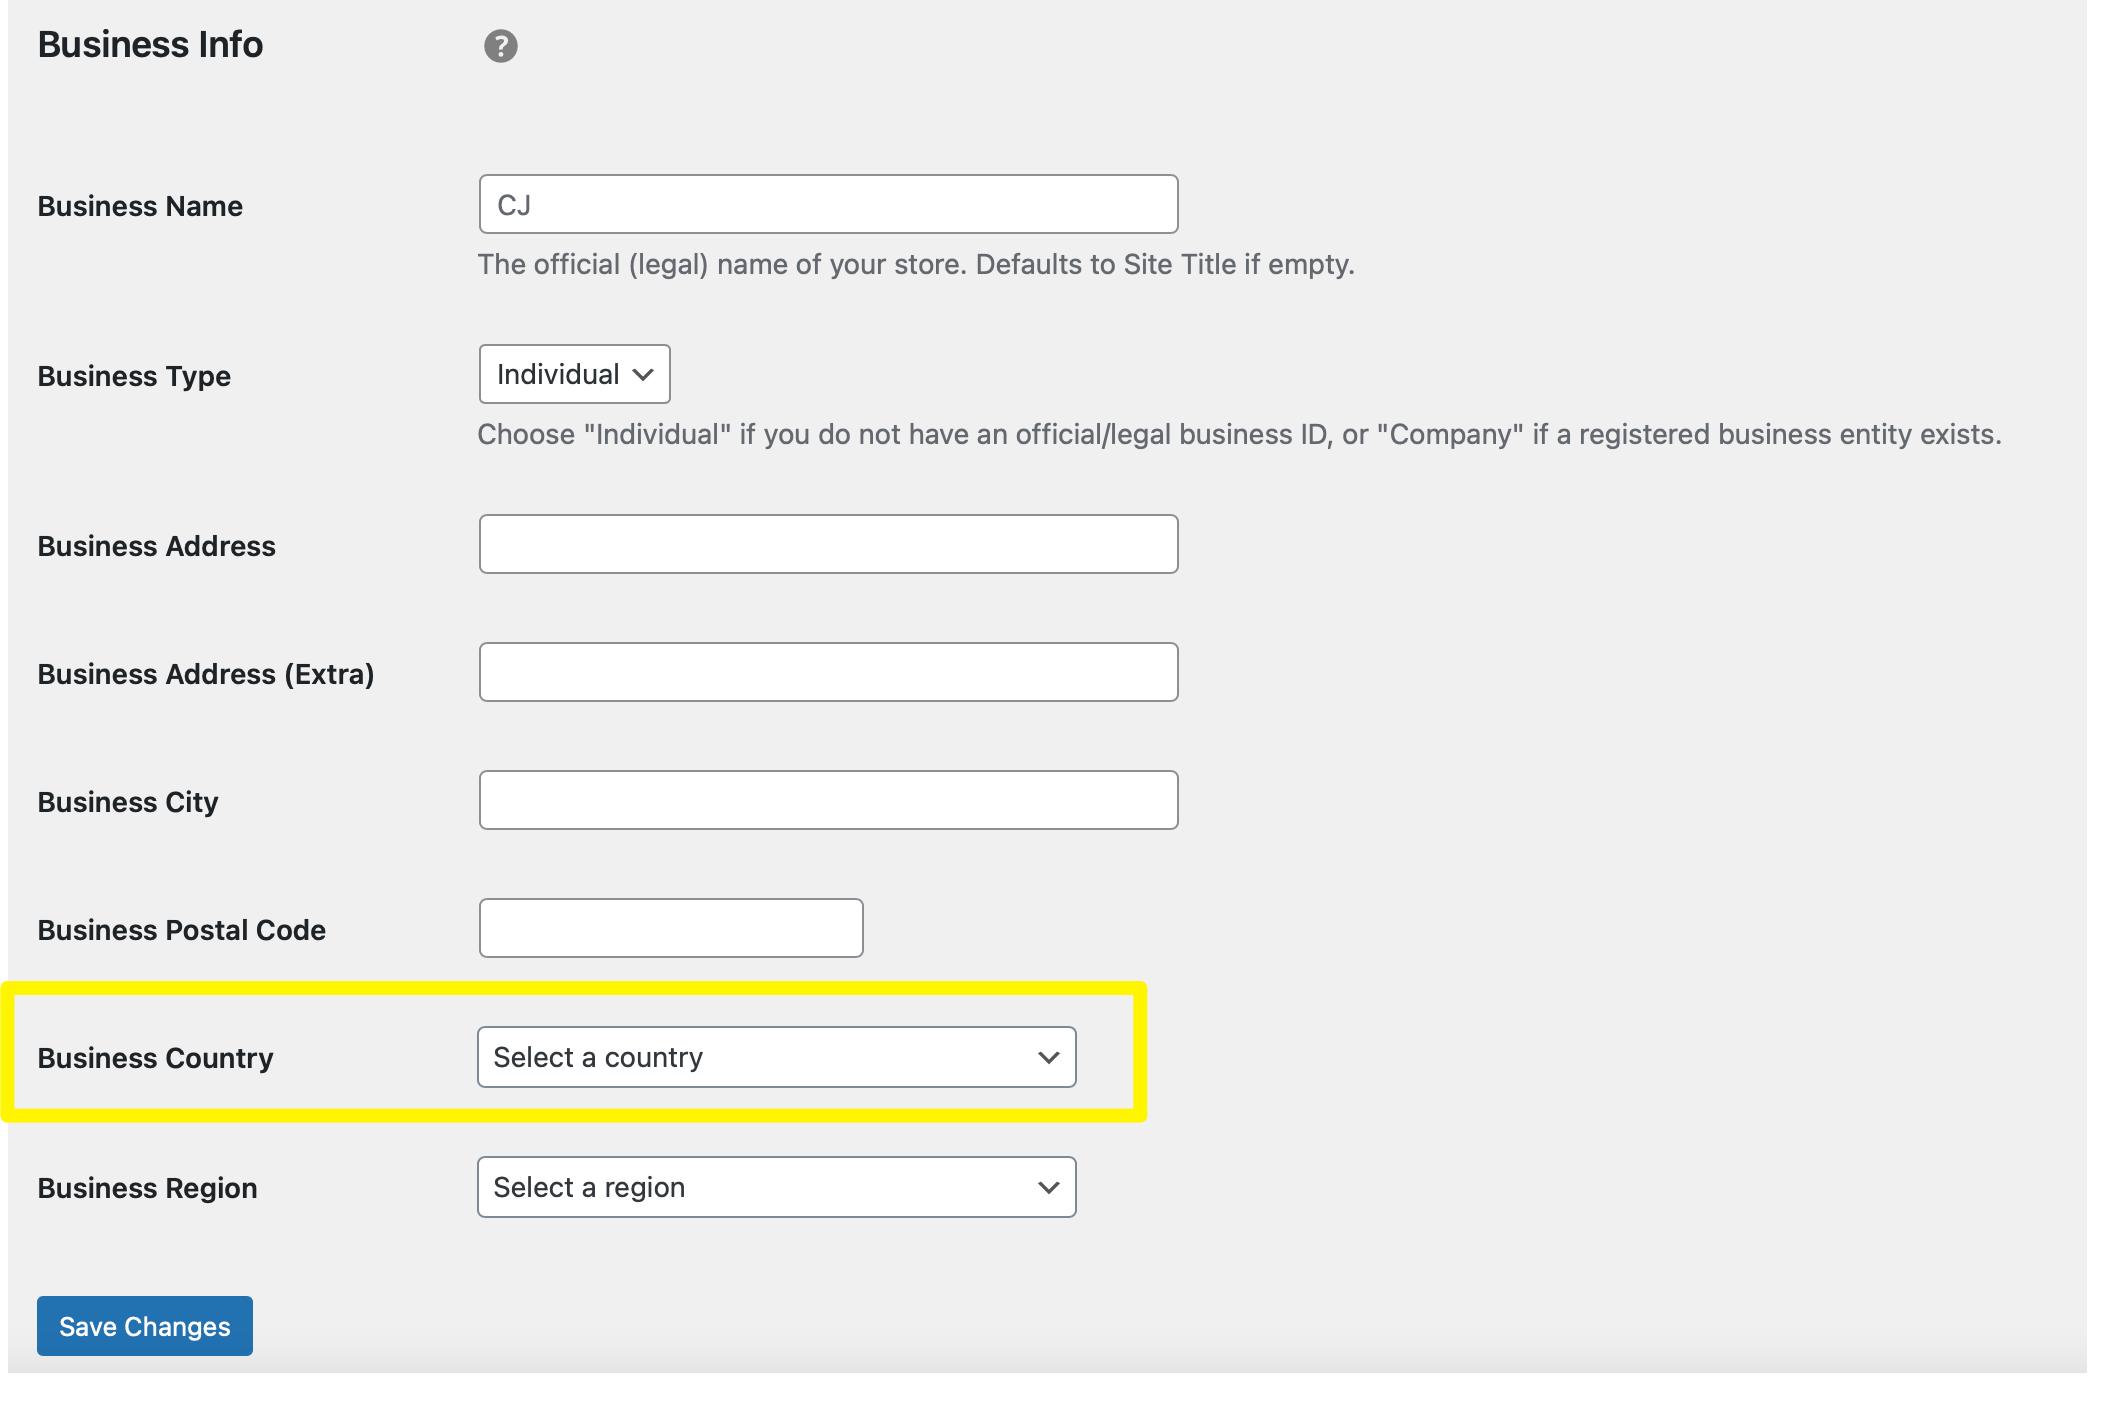
You can also choose a name and pick your business type (individual or company). Then hit Save Changes at the bottom of the page.
3. Set Up a Payment Method
Next, it’s time to configure at least one payment method. By default, Easy Digital Downloads supports PayPal and Stripe. You can also use gateways like Braintree or Authorize.net via extensions, if you upgrade to the paid version of EDD.
To set up your preferred payment method, navigate to Downloads > Settings > Payments. Then switch over to the Stripe and/or PayPal tabs to connect to your account(s):
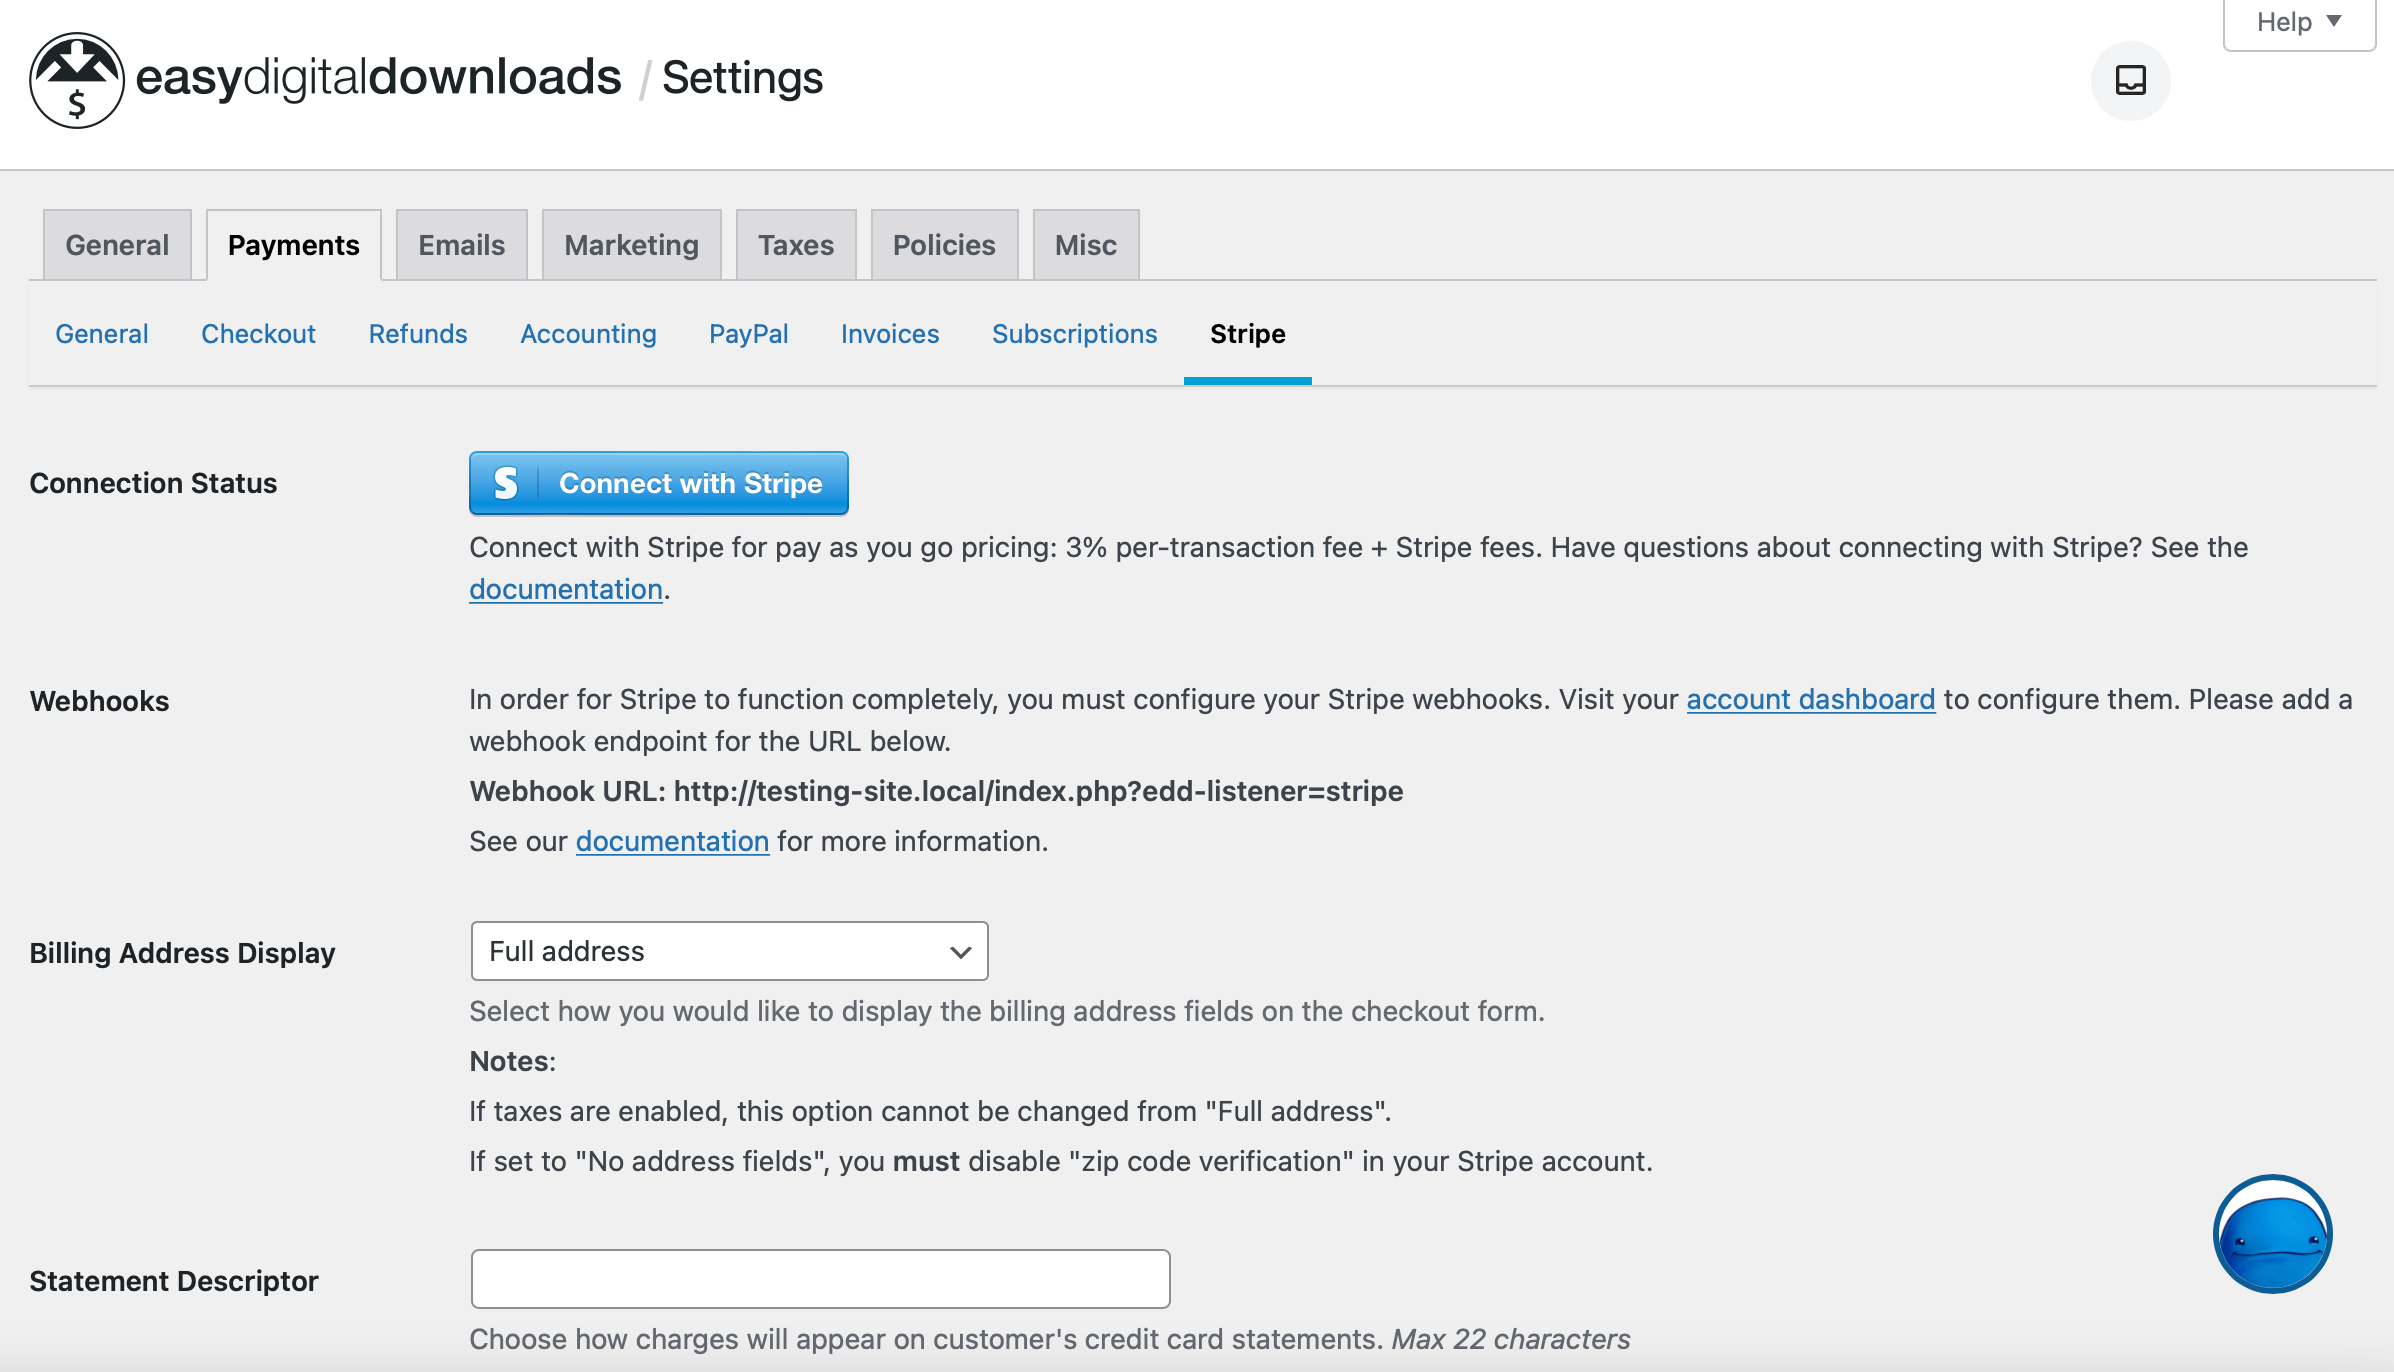
Once the connection is established, return to the General tab to select the payment gateways that you want your customers to use:
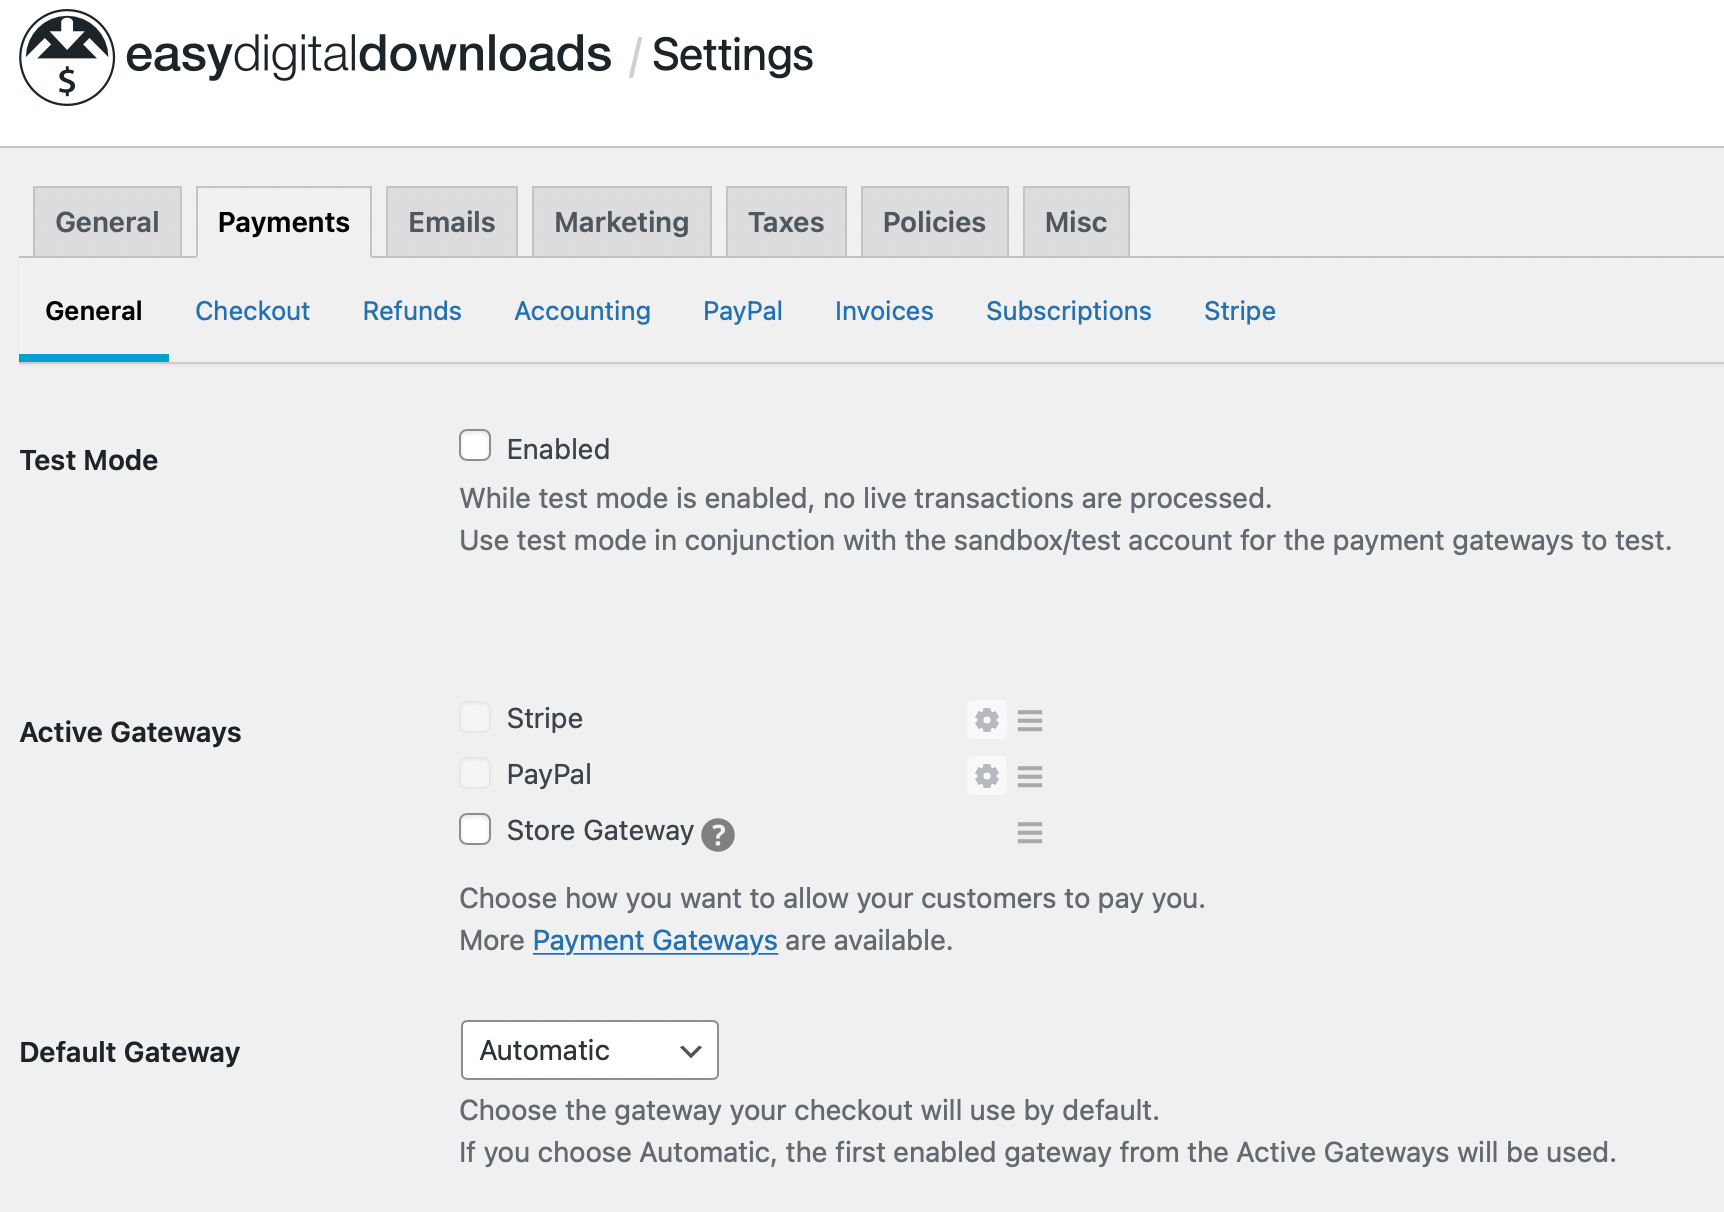
You’ll also need to choose a default gateway, which will be selected automatically when customers reach the checkout page. Don’t forget to save your changes when you’re done here.
Additionally, it’s a good idea to revisit the general EDD settings and go to Currency:
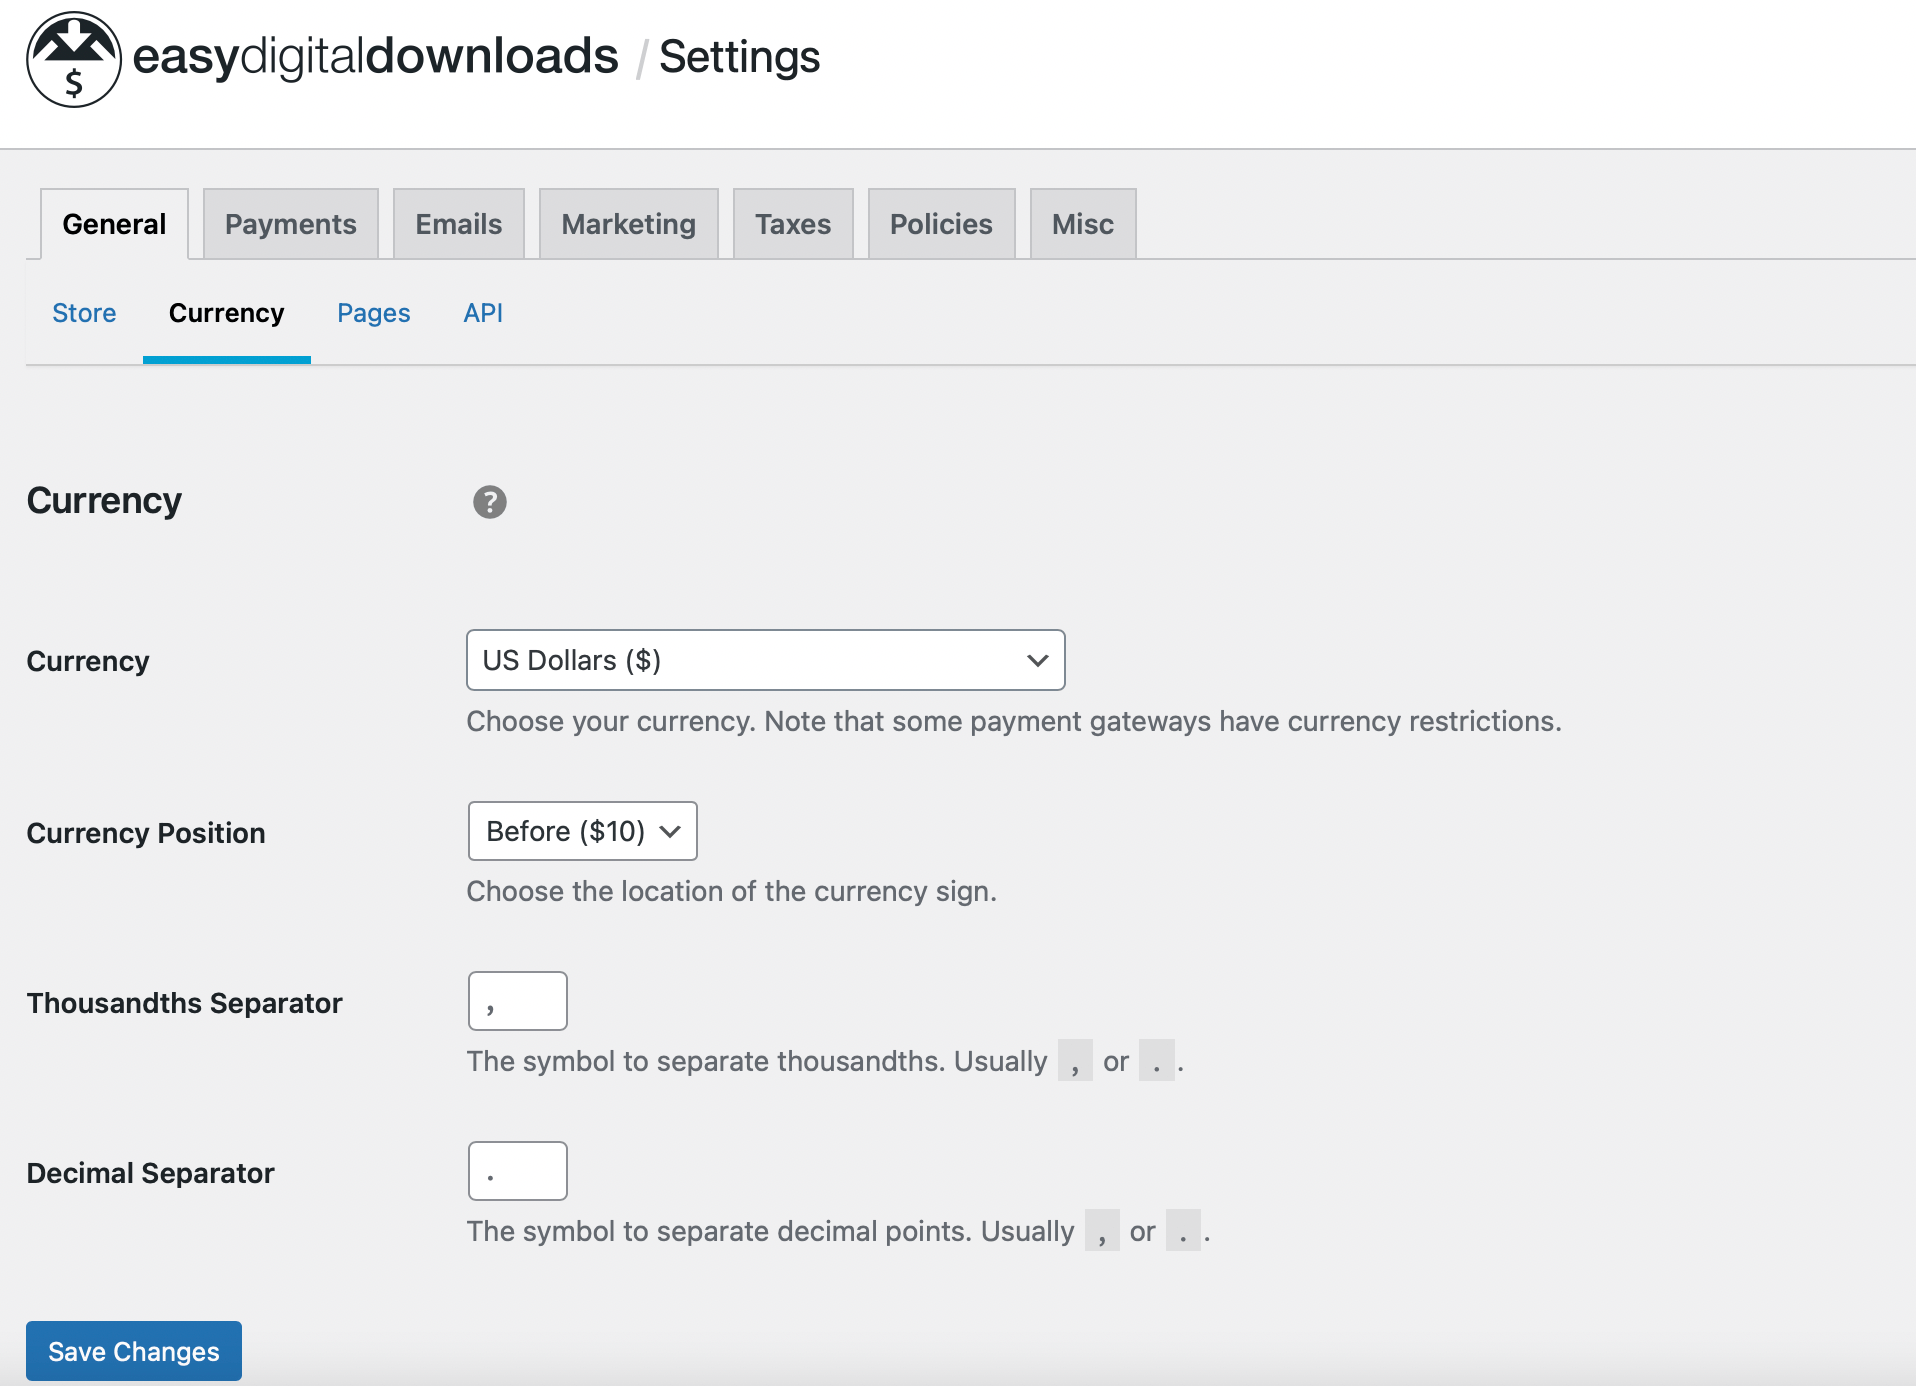
The plugin automatically uses US dollars, but you can choose a new currency using the drop-down menu.
4. Create Your First Product
With the plugin and payment methods sorted out, it’s time to create your first digital product. To do this, head to Downloads > Downloads and click on Add New:

Give your product a name, and add a description in the main text area. Then turn your attention to the Download Details section at the bottom of the editor:
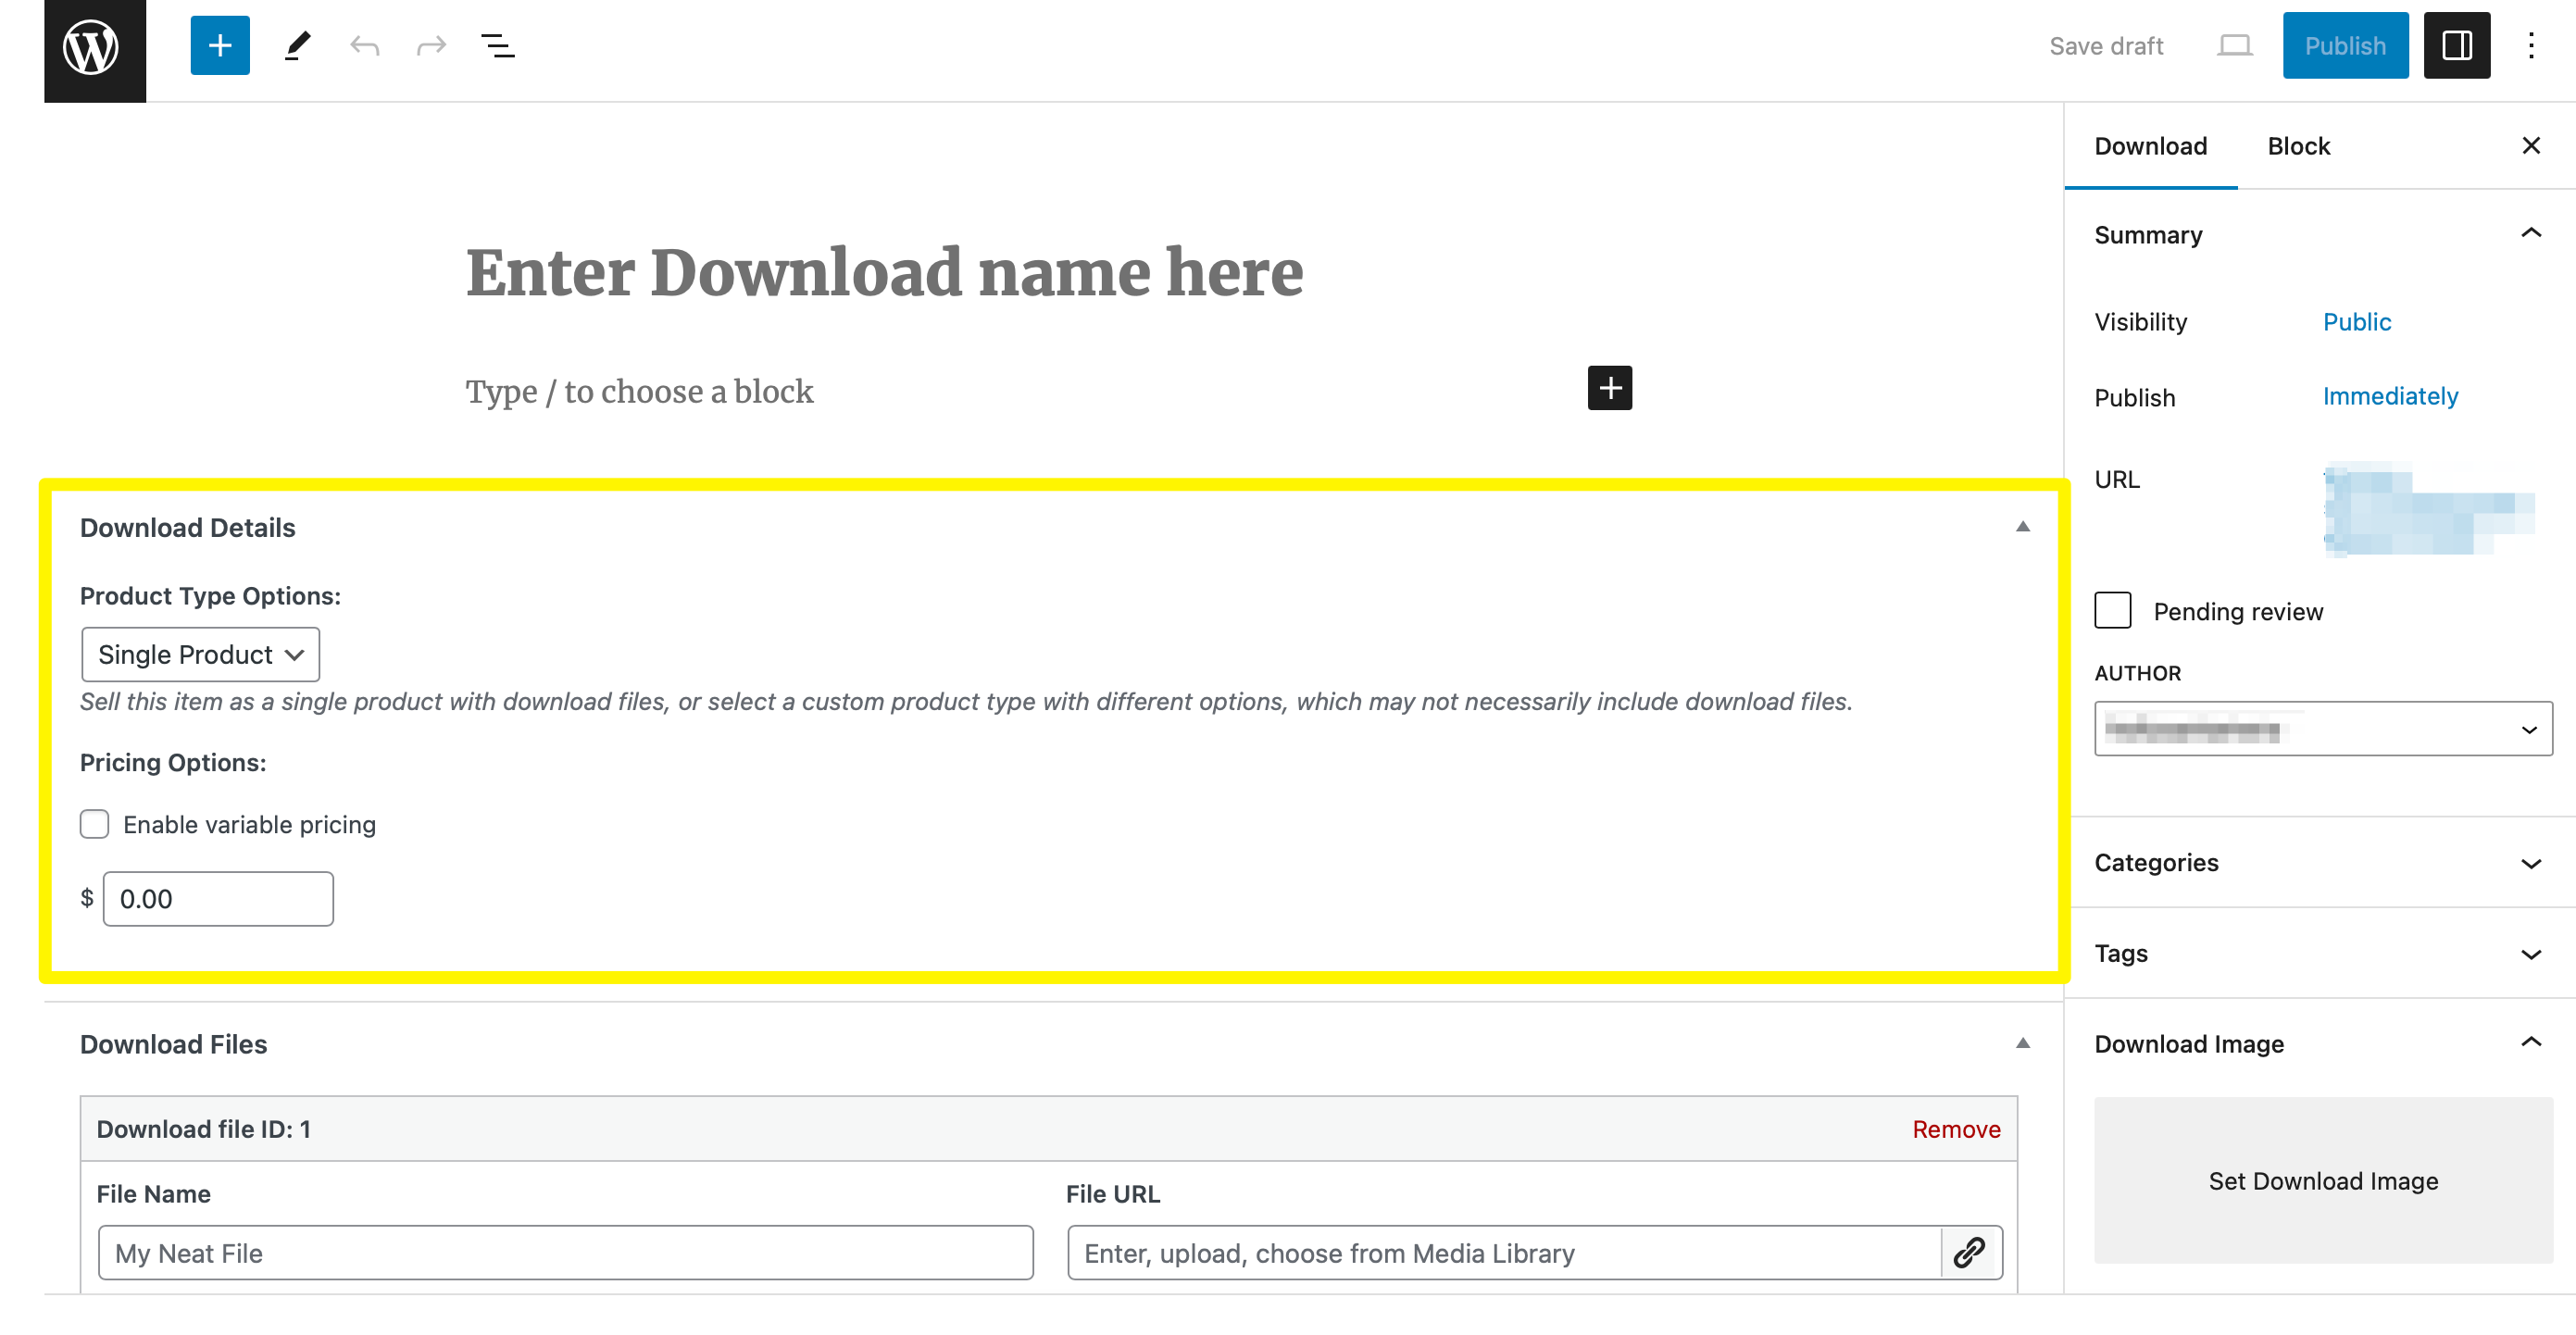
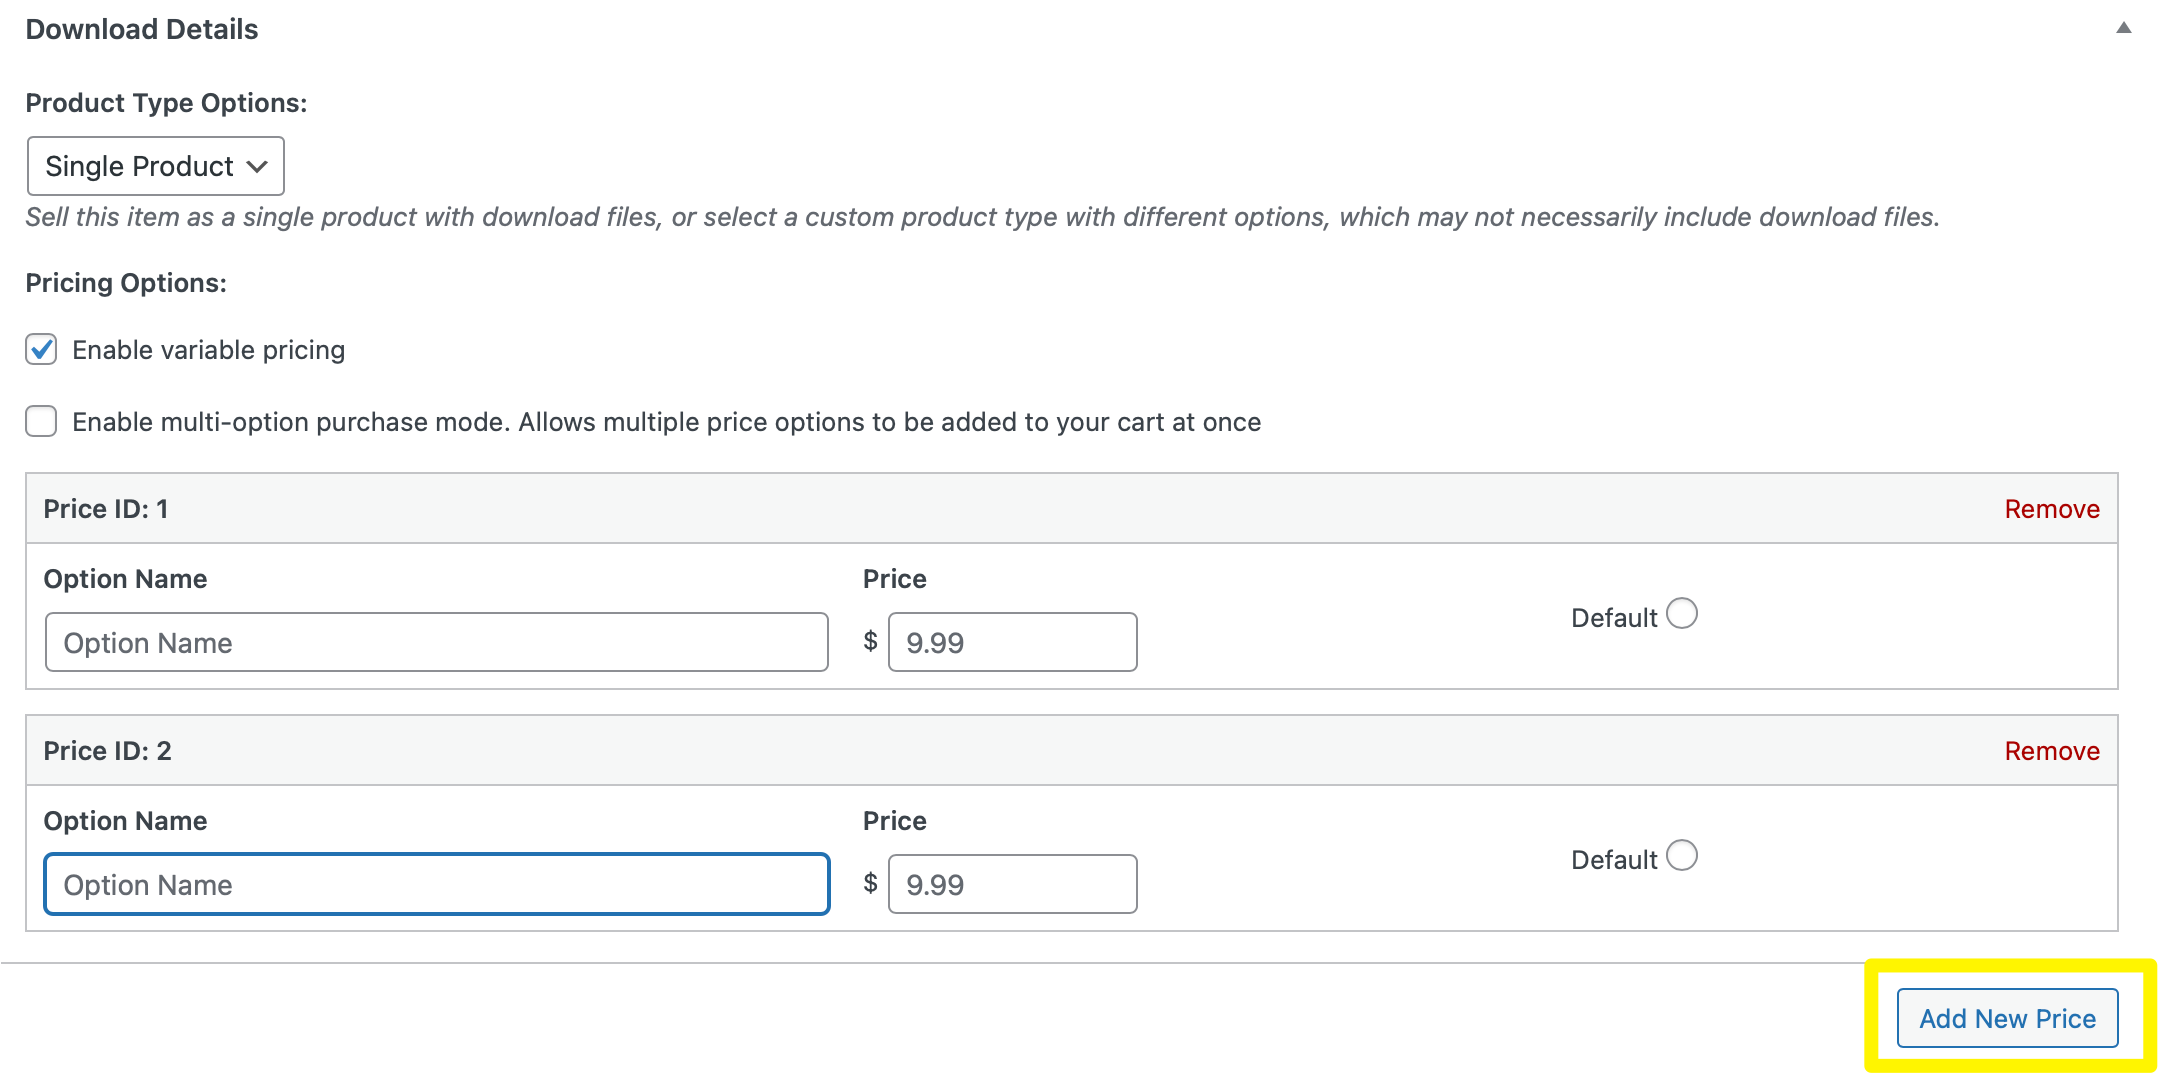
The first option enables you to sell your digital product as a single item, or as part of a bundle or service. Then, under Pricing Options, you can set a price for your download.
If you sell variations of your product, check the box to enable variable pricing and enter the relevant details below that. You can select Add New Price to generate a new variation:
In the Download Files section, you can upload a digital file from the site’s Media Library or your computer. However, it’s best not to host a lot of product images on your site’s server, since that can lead to slow loading times.
Instead, you can enter a link to a file storage solution like Dropbox or Amazon S3. You can also find EDD extensions for each of these platforms, which allow you to manage your stored files directly through the WordPress dashboard.
Finally, if you open the Download Settings to the right of the editor, you can assign your product to specific categories, upload a compelling featured image, and set a download limit:
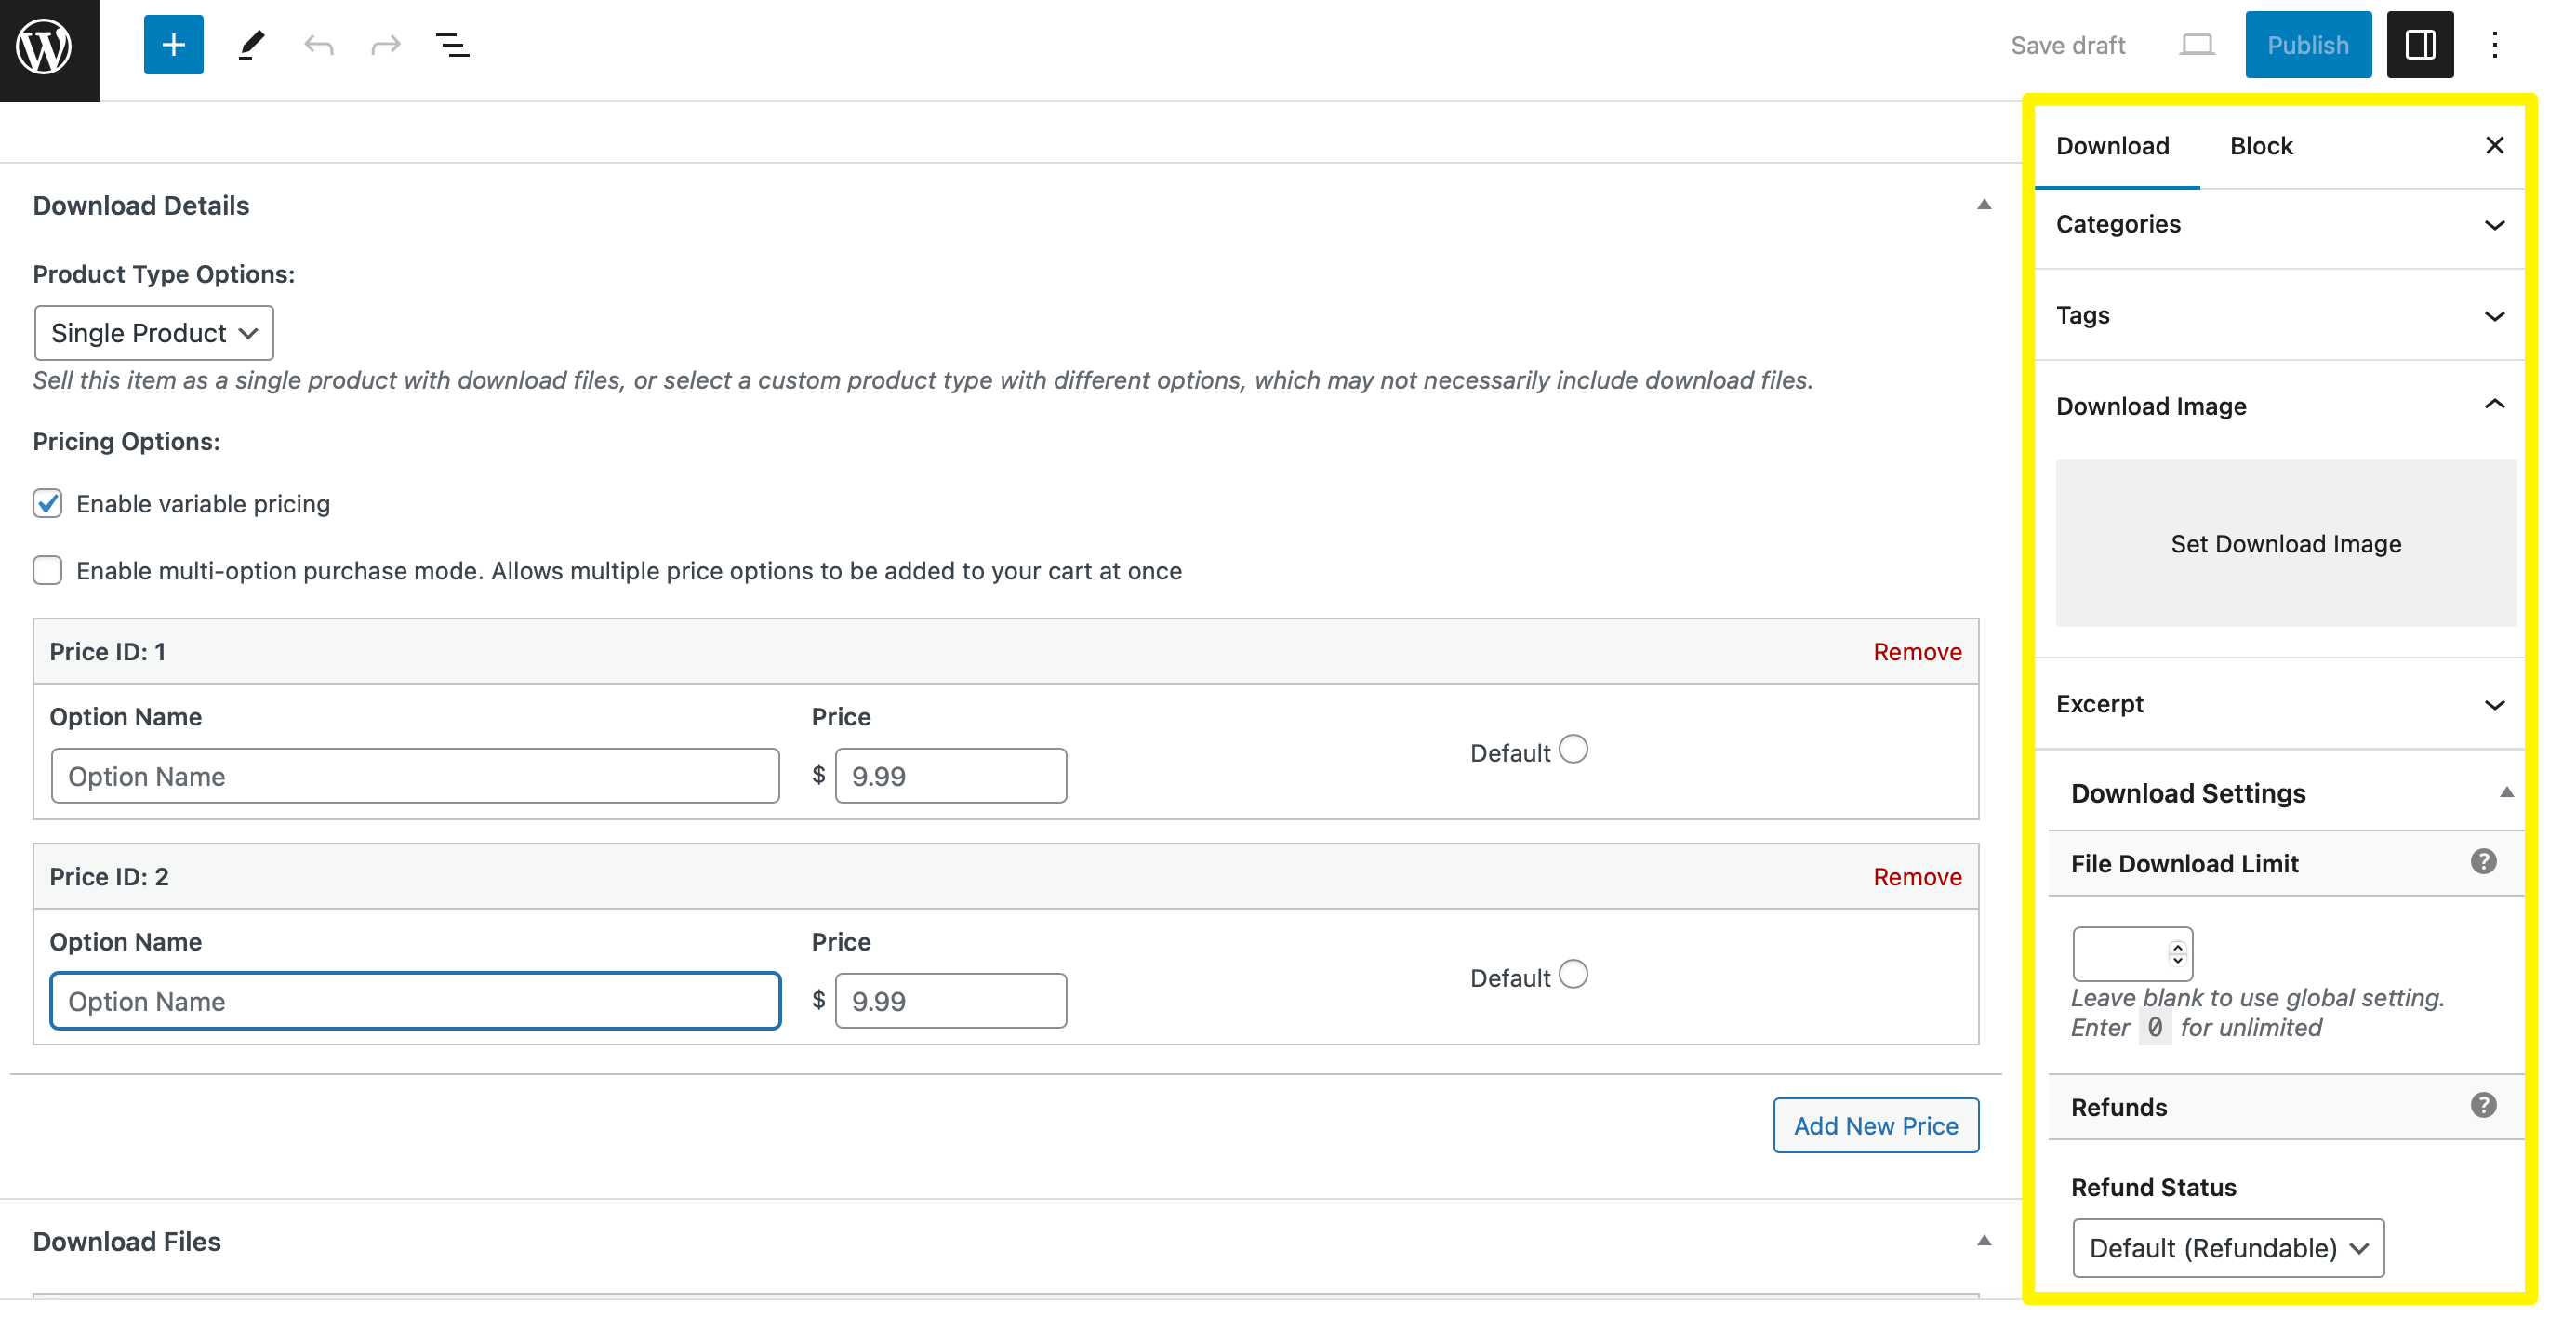
You’re also able to configure returns information and customize the purchase button.
5. Preview and Publish Your Digital Product
Once you’ve added all the information for your digital product, you can view it on the front end of your site by selecting Preview at the top of the editor. There, you can read through your product’s details and make sure the content displays correctly:

You can also click on the purchase button to proceed to the checkout page and make sure everything is working as expected.
If all looks good, click on the blue Publish button to make your product live. Then add more products as needed, following the same steps.
Now, you just need to get your products seen by potential customers. There are many ways to do that, but you can start by incorporating relevant keywords within your product titles, descriptions, and URLs. A free tool like Google Keyword Planner will help you identify high-ranking keywords in your industry.
What’s more, you can promote your products on social media, or create a mailing list to send newsletters and personalized offers to your subscribers. There are many ways to drive traffic to your website!
Conclusion
Digital products are a great way to generate income without the need for inventory space or shipping methods. As such, they’re a solid option if you want to make money online but lack the resources, time, or budget to facilitate the sale of physical goods.
To recap, here’s how to start selling digital products and downloads in WordPress, in just five steps:
- Set up a WordPress website.
- Install the Easy Digital Downloads plugin.
- Set up a payment method.
- Create your first product.
- Preview and publish your digital products.
While WordPress is a perfect platform for building your ecommerce website, you’ll need a top-quality web host as well. At HostDash, we offer dedicated WordPress plans that will ensure your site provides an excellent customer experience!
Featured image: Pexels.


